Showing posts with label FBA. Show all posts

Sunday, 22 March 2015

Go wild for the basics

I'm doing my damnedest to keep up with the posts but when you can whip up one of these skinny t-tops  in a couple of hours, well it just don't help the situation! 
Simplicity 1325  is my new best-friend, having already made the tunic-dress and the T once before. 
Don't know about you, but once a pattern has been made-up, there's  always modifications that I think ..." ooo next time..." and the T was no exception.                                                                                                     

First time around, I thought the neck was a little high, the arm length OK (it didn't help my messing up the cuff and having to shave off an inch!) and the the fit ..well it fit! 

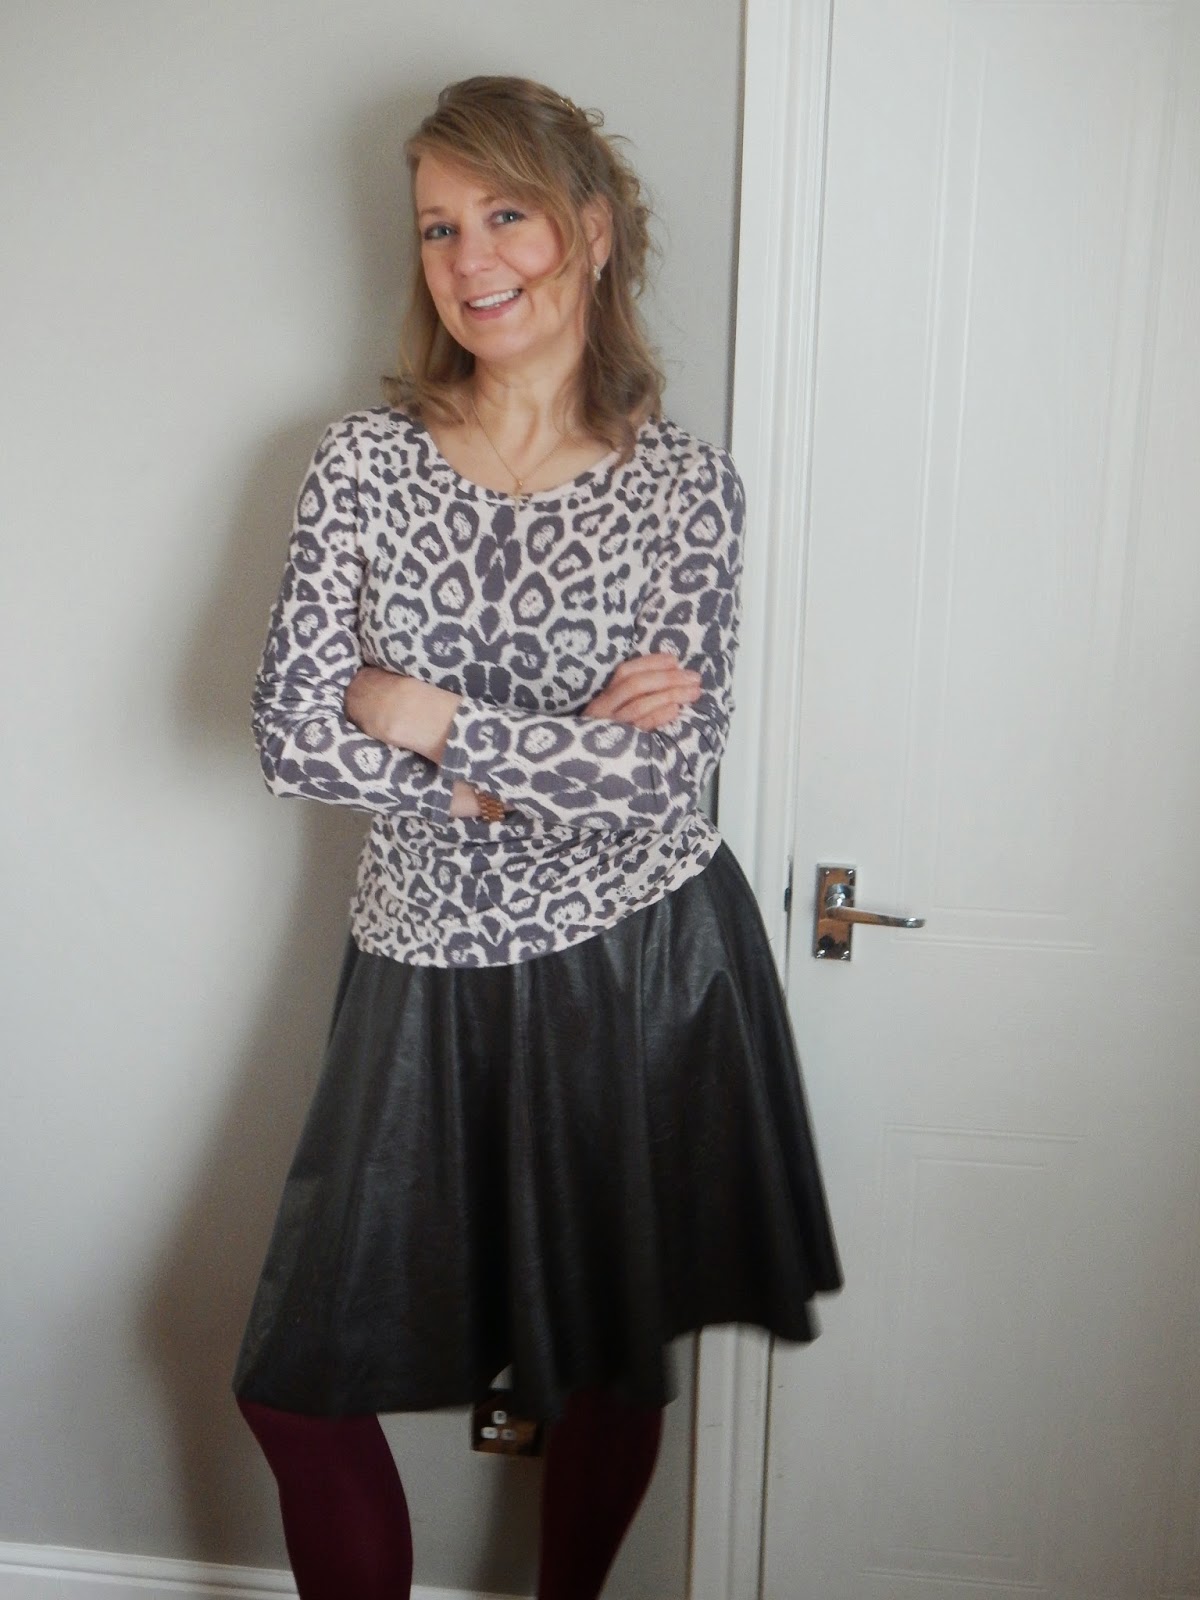
So this time round, I dug out this beautifully soft pink jersey out of the stash and decided to give it a gentler more relaxed look, to tame the animal side of it.
I traced off the pattern, did a FBA to give the boys some room, lowered the neckline and lengthened the sleeves by 3 inches! 


It was so quick to put together, as construction took place on the over-locker. 

 I was really chuffed with the neck band and approached it slightly differently to the pattern instructions. I know I should have taken pics for those of us who are more visual learners and will do next time around making this but here's the wordy version.  

  • Over-lock on long edge of neck band
  • On inside apply an inch wide band of stretch fusible interfacing around the neck edge
  • Stay stitch on top along the seam line 
  • On right side, pin raw edge of neck band along stay stitching (start at centre back ) 
  • Join the band at centre back 
  • Stitch band on 1/4 in away from stay stitching
  • Cut away seam allowance to 1/4 
  • Turn over band so finished edge is on inside and covers the stitch line 
  • From right side stitch in ditch catching the underside of band ...

 VoilĂ - one neat neck band  


I love the slouched cuff effect 

The only downside to this top ( there has to be one doesn't there! :( )
was the pattern placement- I just didn't have enough fabric to be able to get the print down the centre back - boohoo - I can live with this as I cant see it - and everyone else says that unless pointed out it not obvious ( to the untrained eye!)
So there we have it folks - one very easy to construct and easier to wear T-top 

Thanks for stopping by - till next time XX Amanda XX


Wednesday, 3 September 2014

A Match Made in Shantung and Lace

Amidst the frenzy of redundancy, job connections and getting the young people back off to school, there seems to have been little time for blogging; yet among the manicness of it all, I have managed to retained a smidgen of sanity (based on the fact, I weren't that sane before!) within the sanctuary of the sewing room; never have I been so grateful for the  focus and positivity of sewing.  So with out further ado... 
There's been so much beautiful lace around this year and as usual I'm a bit slow off the mark. I picked-up this cotton open weave lace fabric quite unintentionally when out shopping with the little Wyatt...There was the usual roll of the eyes as if to say " do you really need that mother" but hey  we all know how it works, strike while the iron is hot and inspired! just need to educate her in the artful practice (although that could come back and bite, ouch)  
     
Question for you...Do you normally have a clear idea what pattern you will use when you pick a fabric, or just go all gung-ho and hope further inspiration will hit later? Me, I generally have a reasonable idea on a pattern, but not "sew" with this one (owww bad pun sorry).  I just knew I wanted to try out lace and thought this would make-up a decent top of sorts.
Due to the open weave, and to spare others the sight of bare flesh, I also purchased a cream shantung (whoooo how decadently posh) and thought of using it as a lining in some way. 
When it came to making up, many a pattern was pulled out, mused and cogitated over. The more I inspected, draped and handled  the lace, I realised that I didn't want to distort its pattern with pleats, darts or seams, then hey-presto! McCalls 6926 View C, looked as though it would do the job.. minus the 80's hip tie!  
                                                
I played a round with attaching the shantung as an interlining, but felt I could end up with a heavy and boxy tunic, completely missing the intention of a light 'n' airy number. "TING", light-bulb moment, a completely separate camisole-top would let the lace show itself off and I'd gain with an extra wardrobe piece that could be utilised- come on now admit it, just how useful is a camisole! I have now worn this with umpteen items, cut another ready with plans for many other variations, mainly down to the fact that, not only is this a great staple.. allow me to plump up the plumage here...I actually managed a "successful" FBA, pushing the dart to the seam!! hallelujah its a miracle
I used the under slip from McCall's 6883 as a template, traced off the upper section, applied the slash and spread principle and rounded the dart leg at the seam. The cami was cut on the bias so the beautiful spring allows it to mould to the body! I went with the matt slubbed side as the right side facing and then the shiny, as the contrasting bias trim and straps. I am particularly proud of the bindings, all self-made, with the straps continued from the front and back trim! oh and a tiny-whiny rolled hem - sorry didn't take a pic of this.
Thought I'd let Valerie model this one,
certainly  best to keep a close up of my chest
 and the bulgy bits that go with it  under wraps! :)  
The lace top itself, with just two pattern pieces has little to offer or dwell upon regards to sewing techniques and ability challenge. The improvisations came with neck, arm and bottom hems. Facings for the neck were obviously out, so more bias strips were cut from the shantung and used to edge the neck and sleeves; wider on the sleeves. 
When it came to the hem I was a bit stumped, 
  • An open weave the lace couldn't be cut to scallop it along its own design
  • A bias edge would look 'naff' 
  • Machine stitching ran a high risk of puckering up!
  • Option left...hand-stitch.

I'm actually starting to get a bit of a dab-hand at the old hand stitching or at least I don't loath it quite as much these days, may-be the endless road of my Westfalenstoffe hem was a cure! A great advantage of hemming lace is that your stitches literally disappear, and the lace retains its 'give' and recovery.                                                   

End result, well I really like this, it's such as easy duo to wear and its simplicity enables it to be dress up or down- I might even try it over a contrasting coloured cami.  
On my last visit to the fabric store, I picked up the same lace but in black...its been reduced to £2.00 a metre! rude not too- so if your signed up and attending the "sew Brum" on Oct 4th you could scoop up a bargain! 
TaTa for now- thanks for dropping by and reading 

Amanda X

Thursday, 7 August 2014

Westfalenstoffe fit for a Wedding

Everyone loves a good wedding, right? and last Friday the Wyatt Clan attended the most fun and happy weddings in a long time... It's fair to say though, as a guest, finding the right outfit can be a bit of quandary, never alone making one. 
The biggest head scratcher I have to say was "which" pattern to choose, copious amounts of sourcing and reviewing narrowed it down to Vogue's Bellville Sassoon 1296; this is so me and I just fell in love with the whole outfit. However...the wedding had a vintage theme to it, so in keeping I plumped with the Butterick 6018

The Fabric used was a Westfalenstoffe Organic Cotton, Red Pink Flowers and Birds from Dragonfly Fabric's with a great offer of 15% off thanks to the promotion from Jane @ Handmadejane .


I started the said project two weeks prior to the event- rather late I know, but life on the hamster wheel had been spinning pretty fast for me to get off any earlier. 
Having used Butterick patterns previously, here  here and here, I had experienced various fitting issues up top, but never ( can you believe) completed a FBA! ( Full Bust Adjustment). Wanting to get the best fit possible, it was also the perfect opportunity to test out the enormous amount of research material of tutorials, tips and instructions that are out there. It all seems so straight forward and logical when your reading about it!
Not to make this post too long winded, nine muslins later!!! and I'd just about cracked it; it was like a rewrite of Goldilocks and her bears, this ones too tight, this ones to loose, this ones...by the time I'd finished I didn't even need to refer to the excellent tutorial by Christine Haynes.I'd gone on my upper bust measurement, applied the rule of increasing 1 cm per cupsize or 1/2 the total difference between upper and full measurements = both came out at 3cm. (but too big)The biggest issue was when the sleeve was inserted, it just changed the whole fit...too tight under the arm due to the increased U shape of the armscye shape becoming; if anybody has some wisdom on this it would be gratefully received. 
Think you can see just here that there is some tension around the front arm area. Darn-it!
One positive technique I came up with (sure I wont be rocking many boats) but I thought it was pretty smart, was to use sewers carbon paper to mark the darts- I then basted down the centre line to join the interlining fabric, then sewed the dart legs together - result, no shifting of interlining, no bubbles at dart points yeh!!

I wanted the white back ground to retain its crispness, and used a really fine cotton voile to interline the bodice section but hang as a loose lining for the skirt; sharpness of the white works perfectly but it did added a tiny tad too much weight.
In for a penny in for a pound as they say- a net skirt was added for additional va-va-voom- This again I thought was pretty genius! attached with popper tape that's used for duvet covers! this way the net doesn't have to be worn every-time nor laundered so will keeps its umph. 
Okay fair cop, one flaw it would of been better if it was sandwiched between the dress fabric and lining, as it was a bit itchy on the legs (an additional slip remedied that!)  
Overall I think it was a great sew, the bust fitting could still be improved and not too sure the style is really me, hence will it be worn again? not too sure - but saying that, how many times back in the RTW purchasing are we guilty of only wearing something once for an occasion..I know I am!. Having said that, it did make me feel very girly and I'm totally proud and in love all the little details that I took the time to include, from the self- covered buttons and contrast cuffs, to the hand stitched 3 meter hem! oh,and the pretty much perfect invisible zipper, with matching side seams may I just add - whoo it really nearly is invisible. 


I leave you with these swoosh shots and a note about the shoes- please say you noticed them? they're "Ruby Shoo, Natalie"- I also own Kate and Miley and have my eye on Gwyneth, but until I fine me a new job, she will have to wait - hehehe
Well thanks for stopping by and reading-I'm off to write the post on the dress that was very hastily made for the evening reception! XX